Showing posts with label UBUNTU. Show all posts

Thursday, 21 June 2018

Install phpMyAdmin in Ubuntu 16.04 LTS

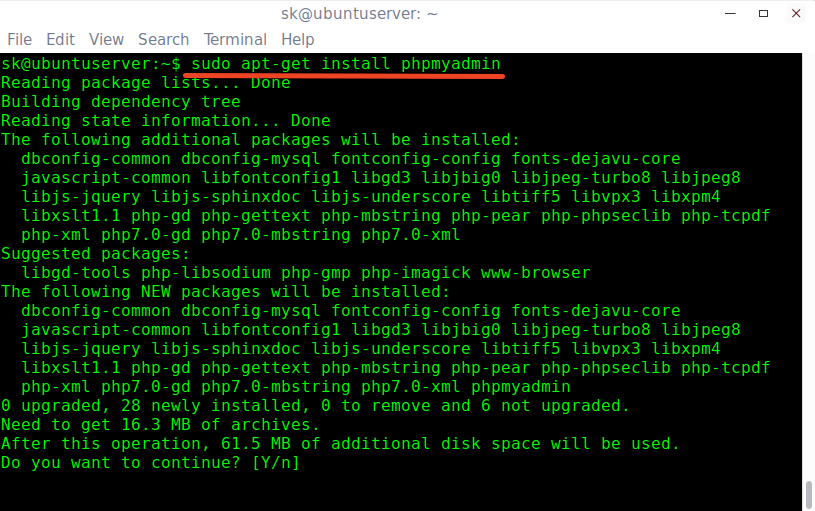
phpMyAdmin is available in the default repositories of Ubuntu operating system. Once LAMP stack is installed and ready, install phpMyAdmin as shown below:


sudo apt-get install phpmyadmin


Install phpmyadmin
Install phpmyadmin
During installing, you’ll be asked to choose the web server that should be automatically configured to run phpMyAdmin. In our case, it is Apache webserver.
Choose apache2 and click OK.
sk@ubuntuserver: ~_002
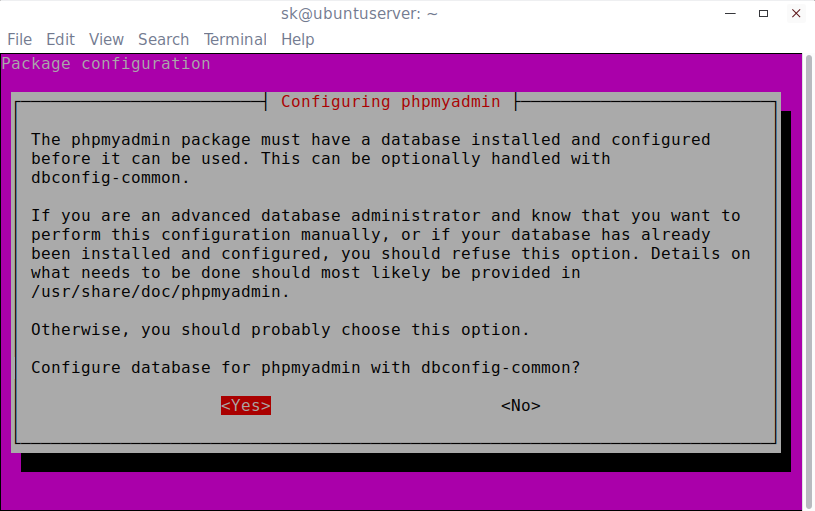
Select Yes and hit ENTER to configure database for phpmyadmin with dbconfig-common.
sk@ubuntuserver: ~_003
Enter a password for phpmyadmin to register with the database server. If left blank, a random password will be generated.
sk@ubuntuserver: ~_004
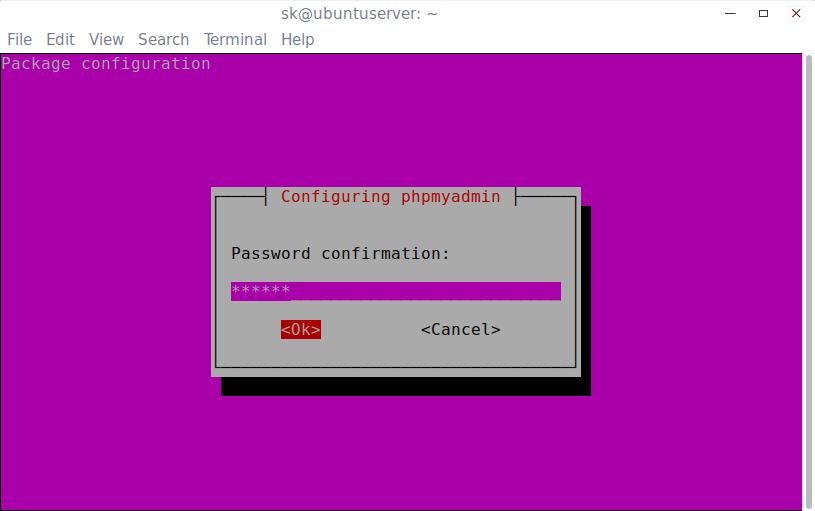
Re-enter the password to confirm:
sk@ubuntuserver: ~_005
Oops! You might be encountered with the following error message:
An error occurred while installing the database: 

ERROR 1045 (28000): Access denied for user 'root'@'localhost' (using 
password: NO) . Your options are: 
* abort - Causes the operation to fail; you will need to downgrade, 
   reinstall, reconfigure this package, or otherwise manually intervene 
   to continue using it. This will usually also impact your ability to 
   install other packages until the installation failure is resolved. 
* retry - Prompts once more with all the configuration questions 
   (including ones you may have missed due to the debconf priority 
   setting) and makes another attempt at performing the operation. 
* retry (skip questions) - Immediately attempts the operation again, 
   skipping all questions. This is normally useful only if you have 
   solved the underlying problem since the time the error occurred.
sk@ubuntuserver: ~_006
To fix this issue, click OK and abort the phpMyAdmin installation.
sk@ubuntuserver: ~_007
Log in to MariaDB or MySQL prompt with root user using command:
mysql -u root -p
Create a new database and database user for phpMyAdmin and grant full permission to the phpmyadmin user.
For the purpose of this tutorial, I am going to create a database called “phpmyadmindb”, and database user “phpmyadminuser” with password “ubuntu”. Please use a strong password which is very hard to guess in the production environment.
Welcome to the MariaDB monitor. Commands end with ; or \g.
Your MariaDB connection id is 52
Server version: 10.0.25-MariaDB-0ubuntu0.16.04.1 Ubuntu 16.04

Copyright (c) 2000, 2016, Oracle, MariaDB Corporation Ab and others.

Type 'help;' or '\h' for help. Type '\c' to clear the current input statement.

MariaDB [(none)]> CREATE DATABASE phpmyadmindb;
Query OK, 1 row affected (0.01 sec)

MariaDB [(none)]> GRANT ALL ON phpmyadmindb.* TO phpmyadminuser@localhost IDENTIFIED BY 'ubuntu';
Query OK, 0 rows affected (0.00 sec)

MariaDB [(none)]> flush privileges;
Query OK, 0 rows affected (0.00 sec)

MariaDB [(none)]> \q
Bye
sk@ubuntuserver: ~_009
Then, edit phpmyadmin/config-db.php file:
sudo nano /etc/phpmyadmin/config-db.php
Replace the database name, database user and its password with the values that you have created earlier.
[...]

$dbuser='phpmyadminuser';
$dbpass='ubuntu';
$basepath='';
$dbname='phpmyadmindb';
$dbserver='localhost';
$dbport='';
$dbtype='mysql';
sk@ubuntuserver: ~_010
Save and close the file.
Next, you must install the following php modules. Otherwise, you will get an error message that says:
The mbstring extension is missing. Please check your PHP configuration.
To install php modules, run:
sudo apt-get install php-mbstring php7.0-mbstring php-gettext
Then, edit Apache webserver config file:
sudo nano /etc/apache2/apache2.conf
Add the following line at the end:
Include /etc/phpmyadmin/apache.conf
sk@ubuntuserver: ~_011
Save and close the file. Restart apache service to take effect the changes.
sudo systemctl restart apache2

Access phpMyAdmin dashboard

Open up the web browser and navigate to http://IP-Address/phpmyadmin.
You should see the following screen. Enter the MariaDB/MySQL ‘root’ user name and its password.
phpMyAdmin - Chromium_012
Congrats! This is how the phpMyAdmin dashboard looks like.
192.168.1.105 - localhost | phpMyAdmin 4.5.4.1deb2ubuntu2 - Chromium_013
From here, you can create, delete, rename, and manage the databases easily.
Source : https://www.ostechnix.com/install-phpmyadmin-with-lamp-stack-on-ubuntu-16-04/

Tuesday, 20 February 2018

How To Install the Apache Web Server on Ubuntu 16.04

Introduction

The Apache HTTP server is the most widely-used web server in the world. It provides many powerful features including dynamically loadable modules, robust media support, and extensive integration with other popular software.
In this guide, we'll discuss how to install an Apache web server on your Ubuntu 16.04 server.

Prerequisites

Before you begin this guide, you should have a regular, non-root user with sudo privileges configured on your server. Additionally, you will need to configure a basic firewall to block non-essential ports. You can learn how to configure a regular user account and set up a firewall for your server by following our initial server setup guide for Ubuntu 16.04.
When you have an account available, log in as your non-root user to begin.

Step 1: Install Apache

Apache is available within Ubuntu's default software repositories, so we will install it using conventional package management tools.
We will begin by updating the local package index to reflect the latest upstream changes. Afterwards, we can install the apache2 package:
  • sudo apt-get update
  • sudo apt-get install apache2
After confirming the installation, apt-get will install Apache and all required dependencies.

Step 2: Adjust the Firewall

Before we can test Apache, we need to modify our firewall to allow outside access to the default web ports. Assuming that you followed the instructions in the prerequisites, you should have a UFW firewall configured to restrict access to your server.
During installation, Apache registers itself with UFW to provide a few application profiles. We can use these profiles to simplify the process of enabling or disabling access to Apache through our firewall.
We can list the ufw application profiles by typing:
  • sudo ufw app list
You should get a listing of the application profiles:
Output
Available applications: Apache Apache Full Apache Secure OpenSSH
As you can see, there are three profiles available for Apache:
  • Apache: This profile opens only port 80 (normal, unencrypted web traffic)
  • Apache Full: This profile opens both port 80 (normal, unencrypted web traffic) and port 443 (TLS/SSL encrypted traffic)
  • Apache Secure: This profile opens only port 443 (TLS/SSL encrypted traffic)
For our purposes, we will allow incoming traffic for the Apache Full profile by typing:
  • sudo ufw allow 'Apache Full'
You can verify the change by typing:
  • sudo ufw status
You should see HTTP traffic allowed in the displayed output:
Output
Status: active To Action From -- ------ ---- OpenSSH ALLOW Anywhere Apache Full ALLOW Anywhere OpenSSH (v6) ALLOW Anywhere (v6) Apache Full (v6) ALLOW Anywhere (v6)
As you can see, the profile has been activated to allow access to the web server.

Step 3: Check your Web Server

At the end of the installation process, Ubuntu 16.04 starts Apache. The web server should already be up and running.
We can check with the systemd init system to make sure the service is running by typing:
  • sudo systemctl status apache2
Output
● apache2.service - LSB: Apache2 web server Loaded: loaded (/etc/init.d/apache2; bad; vendor preset: enabled) Drop-In: /lib/systemd/system/apache2.service.d └─apache2-systemd.conf Active: active (running) since Fri 2017-05-19 18:30:10 UTC; 1h 5min ago Docs: man:systemd-sysv-generator(8) Process: 4336 ExecStop=/etc/init.d/apache2 stop (code=exited, status=0/SUCCESS) Process: 4359 ExecStart=/etc/init.d/apache2 start (code=exited, status=0/SUCCESS) Tasks: 55 Memory: 2.3M CPU: 4.094s CGroup: /system.slice/apache2.service ├─4374 /usr/sbin/apache2 -k start ├─4377 /usr/sbin/apache2 -k start └─4378 /usr/sbin/apache2 -k start May 19 18:30:09 ubuntu-512mb-nyc3-01 systemd[1]: Stopped LSB: Apache2 web server. May 19 18:30:09 ubuntu-512mb-nyc3-01 systemd[1]: Starting LSB: Apache2 web server... May 19 18:30:09 ubuntu-512mb-nyc3-01 apache2[4359]: * Starting Apache httpd web server apache2 May 19 18:30:09 ubuntu-512mb-nyc3-01 apache2[4359]: AH00558: apache2: Could not reliably determine the server's fully qualified domain name, using 127.0.1.1. Set the 'ServerName' directive globally to suppress this message May 19 18:30:10 ubuntu-512mb-nyc3-01 apache2[4359]: * May 19 18:30:10 ubuntu-512mb-nyc3-01 systemd[1]: Started LSB: Apache2 web server.
As you can see above, the service appears to have started successfully. However, the best way to test this is to actually request a page from Apache.
You can access the default Apache landing page to confirm that the software is running properly. You can access this through your server's domain name or IP address.
If you are using DigitalOcean and do not have a domain name set up for your server, you can follow our guide how to set up a domain with DigitalOcean to set one up.
If you do not want to set up a domain name for your server, you can use your server's public IP address. If you do not know your server's IP address, you can get it a few different ways from the command line.
Try typing this at your server's command prompt:
  • hostname -I
You will get back a few addresses separated by spaces. You can try each in your web browser to see if they work.
An alternative is typing this, which should give you your public IP address as seen from another location on the internet:
  • sudo apt-get install curl
  • curl -4 icanhazip.com
When you have your server's IP address or domain, enter it into your browser's address bar:
http://server_domain_or_IP
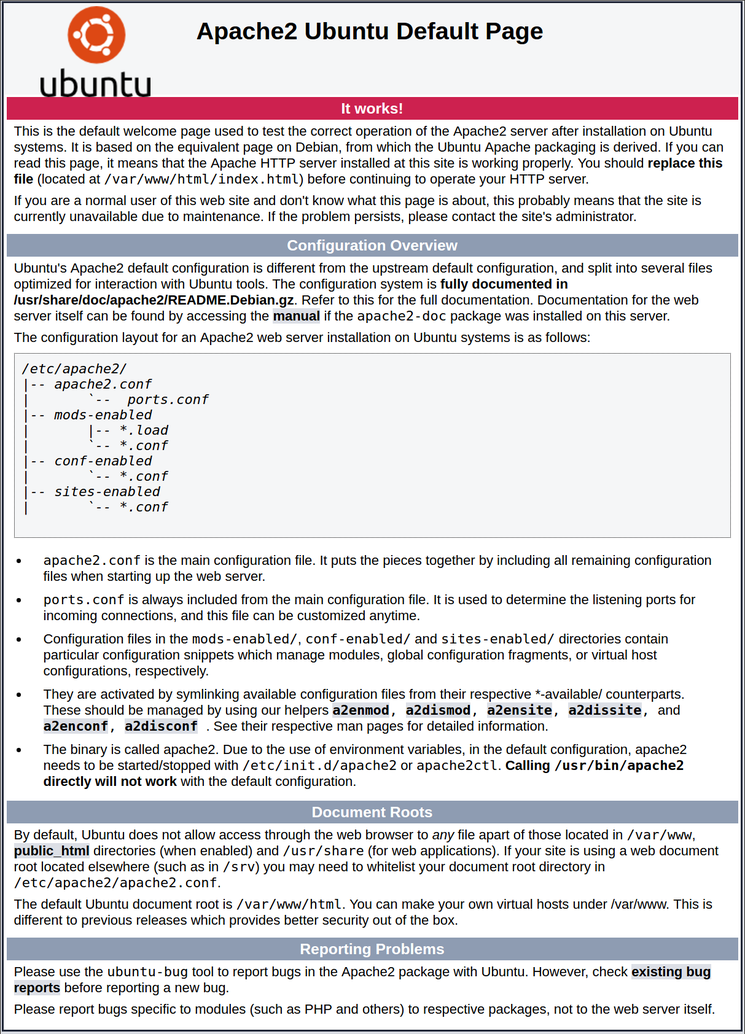
You should see the default Ubuntu 16.04 Apache web page, which should look something like this:
Apache default page
This page is simply included to show that Apache is working correctly. It also includes some basic information about important Apache files and directory locations.

Step 4: Manage the Apache Process

Now that you have your web server up and running, we can go over some basic management commands.
To stop your web server, you can type:
  • sudo systemctl stop apache2
To start the web server when it is stopped, type:
  • sudo systemctl start apache2
To stop and then start the service again, type:
  • sudo systemctl restart apache2
If you are simply making configuration changes, Apache can often reload without dropping connections. To do this, you can use this command:
  • sudo systemctl reload apache2
By default, Apache is configured to start automatically when the server boots. If this is not what you want, you can disable this behavior by typing:
  • sudo systemctl disable apache2
To re-enable the service to start up at boot, you can type:
  • sudo systemctl enable apache2
Apache should now start automatically when the server boots again.

Step 5: Get Familiar with Important Apache Files and Directories

Now that you know how to manage the service itself, you should take a few minutes to familiarize yourself with a few important directories and files.

Content

  • /var/www/html: The actual web content, which by default only consists of the default Apache page you saw earlier, is served out of the /var/www/html directory. This can be changed by altering Apache configuration files.

Server Configuration

  • /etc/apache2: The Apache configuration directory. All of the Apache configuration files reside here.
  • /etc/apache2/apache2.conf: The main Apache configuration file. This can be modified to make changes to the Apache global configuration. This file is responsible for loading many of the other files in the configuration directory.
  • /etc/apache2/ports.conf: This file specifies the ports that Apache will listen on. By default, Apache listens on port 80 and additionally listens on port 443 when a module providing SSL capabilities is enabled.
  • /etc/apache2/sites-available/: The directory where per-site "Virtual Hosts" can be stored. Apache will not use the configuration files found in this directory unless they are linked to the sites-enabled directory (see below). Typically, all server block configuration is done in this directory, and then enabled by linking to the other directory with the a2ensite command.
  • /etc/apache2/sites-enabled/: The directory where enabled per-site "Virtual Hosts" are stored. Typically, these are created by linking to configuration files found in the sites-available directory with the a2ensite. Apache reads the configuration files and links found in this directory when it starts or reloads to compile a complete configuration.
  • /etc/apache2/conf-available/, /etc/apache2/conf-enabled/: These directories have the same relationship as the sites-available and sites-enabled directories, but are used to store configuration fragments that do not belong in a Virtual Host. Files in the conf-available directory can be enabled with the a2enconf command and disabled with the a2disconf command.
  • /etc/apache2/mods-available/, /etc/apache2/mods-enabled/: These directories contain the available and enabled modules, respectively. Files in ending in .load contain fragments to load specific modules, while files ending in .conf contain the configuration for those modules. Modules can be enabled and disabled using the a2enmod and a2dismod command.

Server Logs

  • /var/log/apache2/access.log: By default, every request to your web server is recorded in this log file unless Apache is configured to do otherwise.
  • /var/log/apache2/error.log: By default, all errors are recorded in this file. The LogLevel directive in the Apache configuration specifies how much detail the error logs will contain.
Monday, 23 November 2015

Install Google Chrome in UBUNTU

If it is 64 bit OS follow the below steps

wget -q -O - https://dl-ssl.google.com/linux/linux_signing_key.pub | sudo apt-key add - 
sudo sh -c 'echo "deb http://dl.google.com/linux/chrome/deb/ stable main" >> /etc/apt/sources.list.d/google.list'
sudo apt-get update 
sudo apt-get install google-chrome-stable 
 
 
For 32-bit systems user can use this code:

sudo apt-get install libxss1 libappindicator1 libindicator7 
wget https://dl.google.com/linux/direct/google-chrome-stable_current_i386.deb 
sudo dpkg -i google-chrome*.deb 
 
If error messages pop up after running the command
sudo dpkg -i google-chrome*.deb

then run the command

sudo apt-get install -f 
 
and then re-run the previous command. The error messages mentioned should include something similar to

google-chrome-stable depends on [lib-example]; however; Package [lib-example] is not installed. 
 
This installs a needed library for Google Chrome, then downloads the latest version of Chrome to a temporary directory and installs it. Run google-chrome to start the browser.
During the installation a PPA is added to your system so that Google Chrome receives the latest updates whenever you check for system updates.

Friday, 13 November 2015

Install Sublime editor in ubuntu

Type the following commands in the terminal, for Sublime Text 2 :

sudo add-apt-repository ppa:webupd8team/sublime-text-2
sudo apt-get update
sudo apt-get install sublime-text
 
For Sublime Text 3 :

sudo add-apt-repository ppa:webupd8team/sublime-text-3
sudo apt-get update
sudo apt-get install sublime-text-installer

Wednesday, 29 July 2015

STOP loading previous pages when chrome browser started in ubuntu

While Google gets to work fixing the Chrome battery drain issue affecting Windows users, an easy interim solution may help preserve laptop battery life in the meantime.
The fix? Closing the browser when it’s not needed.

Captain Obvious

Historically, closing an application in Windows is straightforward: you click or tap on the ‘x’ window control button.
Depending on your settings, this isn’t always the case with Chrome; closing doesn’t always mean it fully exits. The browser often continues to run in the background on Windows (and Linux) – something you might never notice.

The Reason Why: You

Whether this happens or not depends on the sort of applications and extensions you have installed in Chrome. Some of these will “ask” the browser to stay awake so that they can continue to function; e.g., to deliver notifications of new e-mail messages or keep an active IRC chat alive.
Google makes it easy to tell when background apps are active: just look for the Google Chrome icon in the system tray (bottom right corner of your desktop screen). Click on this emblem to view a list of active tasks and a access a proper ‘Exit’ option.
If want to stop Chrome from running in the background entirely (i.e., so that it always exits when closed), regardless of extension, you can. You just need to tell it to.

How to Stop Chrome Running in the Background

On Windows or Linux click on the Chrome icon in the task bar/system tray, find the ‘Let Chrome run…’ option and click/tap it to disable/toggle the checkmark off.
It’s that simple. 
The behaviour can also be changed through the browser’s main settings page:
  • Click on the Chrome menu (or press Alt+E)
  • Select Settings
  • Click on the link titled ‘Show advanced settings
  • Under the section headed ‘System‘ untick the box next to “Continue running background apps when Google Chrome is closed”
To reenable the feature simply repeat the steps above but reversing the final step.

Tuesday, 26 May 2015

Create a link in UBUNTU to a app or module or extension -- how to install fpdf in ubuntu

1. Please login as "root" or admin privilege as root equivalent in terminal and give the following command
    # sudo apt-get install php-fpdf
2. Internet connection should be there, after successful installation there will be a file in the following location
   # ls -l /usr/share/php/fpdf
3. Please create a symbolic link and direct the link to make available on your webserver ( the default location of apache web server is " /var/www/ " ) using the following command
    # ln -s /usr/share/php/fpdf  /var/www/fpdf
4. Reload your webserver
  #/etc/init.d/apache2 restart
  (or)
   #/etc/init.d/apache2 force-reload
   (or)
   #service apache2 restart
5. Make sure PHP commands on web page associated with the conversion to PDF function like this
   <?php
          require('fpdf/fpdf.php');
    ?>
6. Finish.

For further reference ,
https://kokikode.wordpress.com/2010/03/28/how-to-install-php-fpdf-in-ubuntu/


Monday, 27 April 2015

Top 10 Paint Applications in UBUNTU

Update 1: Three more applications were added to the list, Tux Paint, Pinta and GrafX2.

Update 2: If you are interested in full-fledged, powerful image manipulation tools, have a look at GIMPKrita (on Steam too) and PaintSupreme. For photo albums and collections have a look at digiKamFotoxx or Shutter.
Kolourpaint
Kolourpaint is a feature-rich painting program for KDE with a typical user-friendly interface, supporting many image formats (including PNG, JPG, TGA, PNM, GIF, BMP, XPM or TIFF). It allows zooming in/out, copy/paste, printing, cropping, rotating, applying various effects (balance, emboss, soften & sharpen). I think it is a perfect application for making simple paintings or sketches.
sudo apt-get install kolourpaint4
MyPaint
MyPaint offers many features and also an interface which is somewhat unusual among painting applications. There is the actual workspace and a separate window with predefined brushes to select from. It features usual functions, including undo/redo, zooming in/out, many brush types, several effects. Two noteworthy things to mention here are the existence of layers and also the brush editor, which allows you to create your own brushes.
sudo apt-get install mypaint
mtPaint
This application is full-fledged, and comes by default with a black background. It offers application-specific settings (like showing/hiding toolbars, splitting window), and also various effects, channels, or layers. Although it’s pretty good and has many options, I doubt it’s a good match for kids.
sudo apt-get install mtpaint
Gnome-paint
This is a very simple drawing application for the GNOME desktop with a typical interface and few options. It offers basic functions and two sidebars: one to choose the tool to use and the other one to choose the color. The feature to insert text is not yet implemented.
sudo apt-get install gnome-paint
Gpaint
Gpaint is yet another simple painting program from GNU, built with GTK, which offers standard functions and quite a few effects, like sharpen, emboss, oil paint or solarize. There is no undo function.
sudo apt-get install gpaint
Tkpaint
Tkpaint is written in Tcl/Tk and offers predefined shapes, various line types, text inserting support and several other tools. It can open GIF, PPM or BMP formats and will save the output image as Encapsulated PostScript or Tcl script.
sudo apt-get install tkpaint
XPaint
XPaint is rather a nice painting application, including a C script editor, toolbox, brush selector, font selector, color and pattern editor, and even a magnifier.
sudo apt-get install xpaint
Addition: Tux Paint
Tux Paint is especially designed for kids, and it provides bulleted buttons for the usual painting tools and brushes. The very nice thing about Tux Paint is that it provides various sounds when the paint tools are used or selected.
sudo apt-get install tuxpaint
Pinta
Pinta is yet another powerful application for GNOME, featuring zoom in/out, fullscreen mode, rotate, resize, brightness/contrast and hue/saturation settings, brushes and the typical painting tools. Except for those, Pinta also offers various effects and layers.
sudo apt-get install pinta
GrafX2
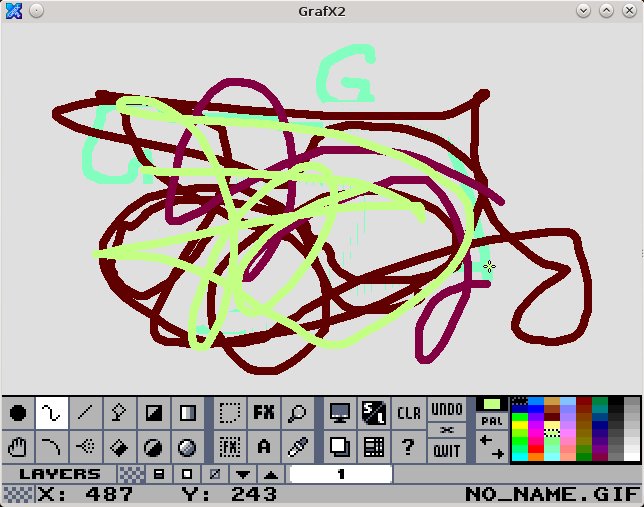
Finally, there is GrafX2, which is a bitmap painting program for X, specialized in 256-color drawing. It is not suitable for children since it is a per-pixel drawing program and the interface may be a bit hard to get a handle on at first.
grafx2
sudo apt-get install grafx2
Rassam-paint
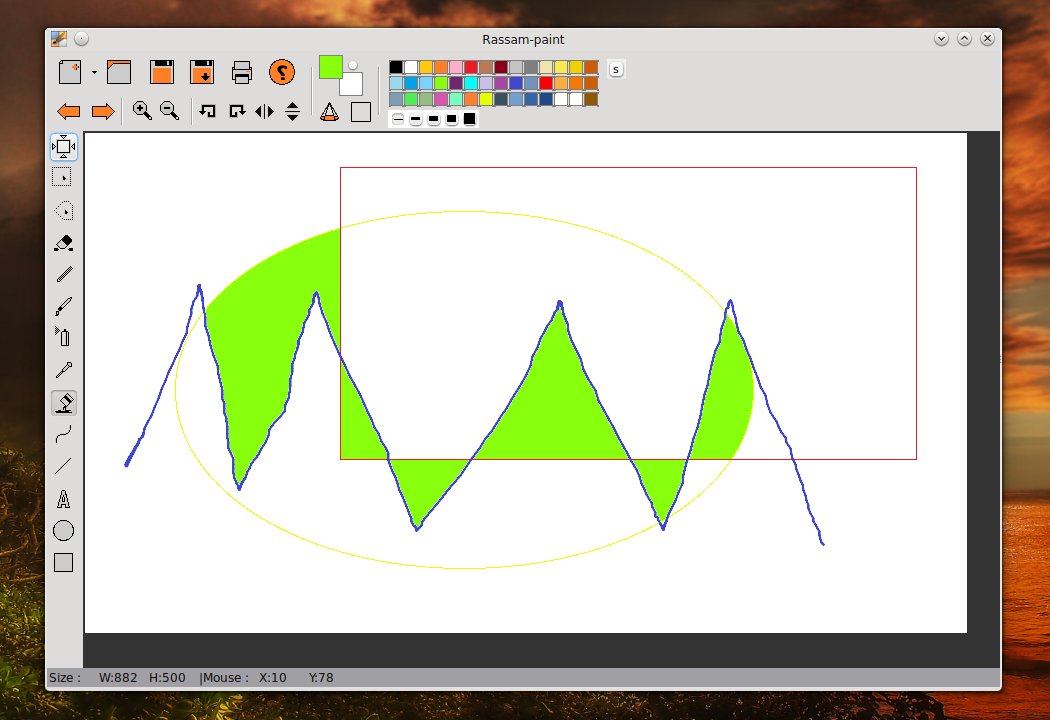
Rassam-paint is a simple painting program written using GTK2 with basic tools such as pencil, brush or flood fill, shapes (line, rectangle, ellipse) and support for all the popular formats out there (PNG, JPG, TIFF, ICO etc).
rassam_paint_03

Install Rassam-paint 1.1 in Ubuntu 14.04, Ubuntu 14.10 and Mint 17

DEB packages are available for both 32-bit and 64-bit systems, as well as pre-compiled binaries. To install Rassam-paint in Ubuntu or Mint you can download the DEB file for your architecture (32-bit or 64-bit) and either double click it or open a terminal and type the command below:
For 64-bit, download the DEB from here and to install it type:
sudo dpkg -i rassam-paint_1.0_amd64.deb
For 32-bit, download the DEB from here and to install it type:
sudo dpkg -i rassam-paint_1.0_i386.deb
The program will be installed as /usr/bin/rassam-paint.
The alternative would be to download the archive which contains the pre-compiled binary, then uncompress it, then run the program. The archive is decompressed in the current directory unless specified otherwise, with no root directory. The unzip package will need to be installed as well (sudo apt-get install unzip).
For 64-bit download the archive from here and type in a terminal:
unzip Rassam-paint_64bit_1.0.zip
./rassam-paint
For 32-bit download the archive from here and type in a terminal:
unzip Rassam-paint_32bit_1.0.zip
./rassam-paint

Friday, 17 April 2015

Setting a CRON Job in UBUNTU


Cron job written so automatic backup doing by the server.

Setting A CRON Job in UBUNTU :


Method 1:

1. Goto Super User by giving the command #su root (here is the super user is root not the same in every system)

2.  man crontab -- gives the detials about the crontab, if needed check the document once before proceeding, if the command not existing install Gnome schedule task tool.

Install "Gnome schedule tasks tool", to install this use the command as
 # sudo apt-get install gnome-schedule

3. start the crontab in terminal using the command

    #crontab -e (should be super user to execute this command)  
    for help use the command ( #man 5 crontab ).
  +--------------------------------------------------------------------+
  |  -e --> editor                                                 |
  |  -l  --> current job display on standard output     |
  |  -r  --> current crontab to be removed                |
  +--------------------------------------------------------------------+

4. Before editing or assigning a task check the command which is going to added in crontab executing or not from the current location.

5. Here in this case, the shell file "bakup.sh" is in /usr/bin/server/bakup folder. so the line added at the end is

   0 0 * * * user_name sh /usr/bin/server/bakup/bakup.sh

   The above command executes on every day at 12 A.M, ie., the db backup taken at every day midnight.

  Another example,

  0 3 * * 0 root /sbin/shutdown -r +5

 The above command restart the server at 3 A.M on every sunday.

  +---------------------------------------------------------------------------------------------------------------------------------------------+
  | Format is minute(0-59) hour(0-23,0=midnight) day(1-31) month(1-12) weekday(0-6,0 or 7=sunday)  |
  | 0 0 * * *        --->  midnight on everyday  |
  | 0 0 * * 1-5     --->  midnight every weekday  |
  | 0 0 1,15 * *   --->  midnight on 1st and 15th of month  |
  | 0 0 1 * 5       --->  midnight on 1st of month and every friday  |
  +---------------------------------------------------------------------------------------------------------------------------------------------+


Method 2:

1. Login as root user and execute the following command.
    # vim /etc/crontab.

2. At the end of the file add the line of command which is to be executed

     0 0 * * * user_name sh /usr/bin/server/bakup/bakup.sh  (Here in our case, the shell file "bakup.sh" is in /usr/bin/server/bakup folder. so the line added at the end)
 

Manual for cron job settings:


Linux Crontab Format

MIN HOUR DOM MON DOW CMD
Table: Crontab Fields and Allowed Ranges (Linux Crontab Syntax)
Field Description Allowed Value
MIN Minute field 0 to 59
HOUR Hour field 0 to 23
DOM Day of Month 1-31
MON Month field 1-12
DOW Day Of Week 0-6
CMD Command Any command to be executed.

1. Scheduling a Job For a Specific Time

The basic usage of cron is to execute a job in a specific time as shown below. This will execute the Full backup shell script (full-backup) on 10th June 08:30 AM.

Please note that the time field uses 24 hours format. So, for 8 AM use 8, and for 8 PM use 20.

30 08 10 06 * /home/ramesh/full-backup
30 – 30th Minute
08 – 08 AM
10 – 10th Day
06 – 6th Month (June)
* – Every day of the week

2. Schedule a Job For More Than One Instance (e.g. Twice a Day)

The following script take a incremental backup twice a day every day.

This example executes the specified incremental backup shell script (incremental-backup) at 11:00 and 16:00 on every day. The comma separated value in a field specifies that the command needs to be executed in all the mentioned time.

00 11,16 * * * /home/ramesh/bin/incremental-backup
00 – 0th Minute (Top of the hour)
11,16 – 11 AM and 4 PM
* – Every day
* – Every month
* – Every day of the week

3. Schedule a Job for Specific Range of Time (e.g. Only on Weekdays)

If you wanted a job to be scheduled for every hour with in a specific range of time then use the following.

Cron Job everyday during working hours

This example checks the status of the database everyday (including weekends) during the working hours 9 a.m – 6 p.m

00 09-18 * * * /home/ramesh/bin/check-db-status
00 – 0th Minute (Top of the hour)
09-18 – 9 am, 10 am,11 am, 12 am, 1 pm, 2 pm, 3 pm, 4 pm, 5 pm, 6 pm
* – Every day
* – Every month
* – Every day of the week
Cron Job every weekday during working hours

This example checks the status of the database every weekday (i.e excluding Sat and Sun) during the working hours 9 a.m – 6 p.m.

00 09-18 * * 1-5 /home/ramesh/bin/check-db-status
00 – 0th Minute (Top of the hour)
09-18 – 9 am, 10 am,11 am, 12 am, 1 pm, 2 pm, 3 pm, 4 pm, 5 pm, 6 pm
* – Every day
* – Every month
1-5 -Mon, Tue, Wed, Thu and Fri (Every Weekday)

4. How to View Crontab Entries?

View Current Logged-In User’s Crontab entries

To view your crontab entries type crontab -l from your unix account as shown below.

ramesh@dev-db$ crontab -l
@yearly /home/ramesh/annual-maintenance
*/10 * * * * /home/ramesh/check-disk-space

[Note: This displays crontab of the current logged in user]
View Root Crontab entries

Login as root user (su – root) and do crontab -l as shown below.

root@dev-db# crontab -l
no crontab for root
Crontab HowTo: View Other Linux User’s Crontabs entries

To view crontab entries of other Linux users, login to root and use -u {username} -l as shown below.

root@dev-db# crontab -u sathiya -l
@monthly /home/sathiya/monthly-backup
00 09-18 * * * /home/sathiya/check-db-status

5. How to Edit Crontab Entries?

Edit Current Logged-In User’s Crontab entries

To edit a crontab entries, use crontab -e as shown below. By default this will edit the current logged-in users crontab.

ramesh@dev-db$ crontab -e
@yearly /home/ramesh/centos/bin/annual-maintenance
*/10 * * * * /home/ramesh/debian/bin/check-disk-space
~
"/tmp/crontab.XXXXyjWkHw" 2L, 83C

[Note: This will open the crontab file in Vim editor for editing.
Please note cron created a temporary /tmp/crontab.XX... ]
When you save the above temporary file with :wq, it will save the crontab and display the following message indicating the crontab is successfully modified.

~
"crontab.XXXXyjWkHw" 2L, 83C written
crontab: installing new crontab
Edit Root Crontab entries

Login as root user (su – root) and do crontab -e as shown below.

root@dev-db# crontab -e
Edit Other Linux User’s Crontab File entries

To edit crontab entries of other Linux users, login to root and use -u {username} -e as shown below.

root@dev-db# crontab -u sathiya -e
@monthly /home/sathiya/fedora/bin/monthly-backup
00 09-18 * * * /home/sathiya/ubuntu/bin/check-db-status
~
~
~
"/tmp/crontab.XXXXyjWkHw" 2L, 83C

6. Schedule a Job for Every Minute Using Cron.

Ideally you may not have a requirement to schedule a job every minute. But understanding this example will will help you understand the other examples mentioned below in this article.

* * * * * CMD
The * means all the possible unit — i.e every minute of every hour through out the year. More than using this * directly, you will find it very useful in the following cases.

When you specify */5 in minute field means every 5 minutes.
When you specify 0-10/2 in minute field mean every 2 minutes in the first 10 minute.
Thus the above convention can be used for all the other 4 fields.

7. Schedule a Background Cron Job For Every 10 Minutes.

Use the following, if you want to check the disk space every 10 minutes.

*/10 * * * * /home/ramesh/check-disk-space
It executes the specified command check-disk-space every 10 minutes through out the year. But you may have a requirement of executing the command only during office hours or vice versa. The above examples shows how to do those things.

Instead of specifying values in the 5 fields, we can specify it using a single keyword as mentioned below.

There are special cases in which instead of the above 5 fields you can use @ followed by a keyword — such as reboot, midnight, yearly, hourly.

Table: Cron special keywords and its meaning
Keyword Equivalent
@yearly 0 0 1 1 *
@daily 0 0 * * *
@hourly 0 * * * *
@reboot Run at startup.

8. Schedule a Job For First Minute of Every Year using @yearly

If you want a job to be executed on the first minute of every year, then you can use the @yearly cron keyword as shown below.

This will execute the system annual maintenance using annual-maintenance shell script at 00:00 on Jan 1st for every year.

@yearly /home/ramesh/red-hat/bin/annual-maintenance

9. Schedule a Cron Job Beginning of Every Month using @monthly

It is as similar as the @yearly as above. But executes the command monthly once using @monthly cron keyword.

This will execute the shell script tape-backup at 00:00 on 1st of every month.

@monthly /home/ramesh/suse/bin/tape-backup

10. Schedule a Background Job Every Day using @daily

Using the @daily cron keyword, this will do a daily log file cleanup using cleanup-logs shell scriptat 00:00 on every day.

@daily /home/ramesh/arch-linux/bin/cleanup-logs "day started"

11. How to Execute a Linux Command After Every Reboot using @reboot?

Using the @reboot cron keyword, this will execute the specified command once after the machine got booted every time.

@reboot CMD

12. How to Disable/Redirect the Crontab Mail Output using MAIL keyword?

By default crontab sends the job output to the user who scheduled the job. If you want to redirect the output to a specific user, add or update the MAIL variable in the crontab as shown below.

ramesh@dev-db$ crontab -l
MAIL="ramesh"

@yearly /home/ramesh/annual-maintenance
*/10 * * * * /home/ramesh/check-disk-space

[Note: Crontab of the current logged in user with MAIL variable]

If you wanted the mail not to be sent to anywhere, i.e to stop the crontab output to be emailed, add or update the MAIL variable in the crontab as shown below.

MAIL=""

13. How to Execute a Linux Cron Jobs Every Second Using Crontab.

You cannot schedule a every-second cronjob. Because in cron the minimum unit you can specify is minute. In a typical scenario, there is no reason for most of us to run any job every second in the system.

14. Specify PATH Variable in the Crontab

All the above examples we specified absolute path of the Linux command or the shell-script that needs to be executed.

For example, instead of specifying /home/ramesh/tape-backup, if you want to just specify tape-backup, then add the path /home/ramesh to the PATH variable in the crontab as shown below.

ramesh@dev-db$ crontab -l

PATH=/bin:/sbin:/usr/bin:/usr/sbin:/home/ramesh

@yearly annual-maintenance
*/10 * * * * check-disk-space

[Note: Crontab of the current logged in user with PATH variable]

15. Installing Crontab From a Cron File

Instead of directly editing the crontab file, you can also add all the entries to a cron-file first. Once you have all thoese entries in the file, you can upload or install them to the cron as shown below.

ramesh@dev-db$ crontab -l
no crontab for ramesh

$ cat cron-file.txt
@yearly /home/ramesh/annual-maintenance
*/10 * * * * /home/ramesh/check-disk-space

ramesh@dev-db$ crontab cron-file.txt

ramesh@dev-db$ crontab -l
@yearly /home/ramesh/annual-maintenance

*/10 * * * * /home/ramesh/check-disk-space
Note: This will install the cron-file.txt to your crontab, which will also remove your old cron entries. So, please be careful while uploading cron entries from a cron-file.txt.